I logged onto windowfarms today and this was the post at the top.
After testing two of the taps in my residence, the pH of the water here is 7.
Plants need water that is slightly acidic for best nutrient absorbtion. This will help to have healthy plants in your windowfarm.
http://our.windowfarms.org/2012/02/21/open-source-science-whats-the-ph-of-your-tap-water/
Showing posts with label WindowFarm. Show all posts
Showing posts with label WindowFarm. Show all posts
Saturday, February 25, 2012


Friday, January 20, 2012
I'm Back
 I am crazy busy, but I have begun my window farm journey 2.0.
Here is my design for the airlift. There is a screw-in connector in the bottom of the reservoir, which goes to the T connector which needs to be lower than your water level. The lower you hang the T the better.
The top of the T goes up to the top of the window farm, and the other end of the T goes to the airpump with a control valve on it to reduce the flow.
This set-up works way better than the coil in the bottom of the reservoir.
Mel
Wednesday, May 25, 2011
Week 7.2 - Strawberry makes an appearance
March 10, 2011


One of the strawberry plants finally grew big enough to move in.

Here it is once I washed the seed starting mix from the roots.

There we go. Now the whole column is inhabited!
Thanks for checking it out!!
MK
Friday, March 11, 2011
Week 4 - Holy cow a BEAN!
February 13, 2011
Here is the update for week 4 of my window farm experiment. This week I purchased a pH testing kit that was in the pet section. It came with a little glass test tube with a lid, a bottle of pH indicator solution, and a little card that tells you what pH you're dealing with. I can't remember how much it was but I am pretty sure it was less than $10.


The ideal pH for tomatoes is around 6 - 6.5 according to this handy source that someone on the windowfarms website found: http://our.windowfarms.org/2010/04/12/files/2010/04/VEG_PPM_PH.pdf. I recommend checking it out, it lists pH values for a lot of the common veggies and such. Anything too far away from that pH can cause nutrient lock out, which means that even though you have the nutrients in the reservoir, the plants are unable to absorb them.
My broccoli is growing, but it's kind of lanky compared to the ones in soil.

I'm going to say that we've been having a lot of cloudy days, so it is probably not getting as much sun as it needs to grow into the robust broccoli that I am waiting for.

My bean plant has a bean!!! So exciting. This is the first veggie that has come out of the window farm so far.


Well that is all I have for this week, thanks for reading!
Here is the update for week 4 of my window farm experiment. This week I purchased a pH testing kit that was in the pet section. It came with a little glass test tube with a lid, a bottle of pH indicator solution, and a little card that tells you what pH you're dealing with. I can't remember how much it was but I am pretty sure it was less than $10.

This is what my pH was for my original column when I tested the nutrients returning to the reservoir. Yikes...
No wonder my tomatoes are suffering. The leaves are turning crunchy and they have brown spots. Hopefully I will be able to get some pH down from the hydro store and then I can lower the pH for my tomatoes.
My broccoli is growing, but it's kind of lanky compared to the ones in soil.


My bean plant has a bean!!! So exciting. This is the first veggie that has come out of the window farm so far.

And in the bottom bottle of my first column I have some Swiss Chard 'Bright Lights'.

For my second column we've already had a casualty. :( It seems that the way I had the airlift tube going into the top bottle the poor little things weren't able to absorb any of the water. I'm beginning to not like this tempest stuff. Hydroton at least absorbs water, but this fluffy white plastic (that is apparently made with recycled pop bottles) does not hold any water at all. This is the result:

Sad day for those two hot peppers. Below is a picture of the top bottle in my second column. You can see the airlift tube on the left. The water ended up just running down the side of the bottle and not dispersing through the medium. The brown spot on the side by the one hot pepper is where the water fell.

The other peppers seem to be doing ok so far. At least once the nutes go through the top bottle they are centred and drip down to the other guys. It drips directly on top of them, however, and I'm not sure they really enjoy that. You can see the salt build up on the leaves.


Here is what I used to mix up my nutes this week:

After mixing up a fresh batch of nutrients for my window farm, I used that pH testing kit to see what it is at before it goes through the plants.

As you can see, the fresh nutes are almost the correct pH after being mixed. I will still have to go get some more pH down from the local hydroponics store, as the water is quite alkaline. Maybe in the future I'll do a more in depth study of the pH changes in a window farm.
When I change out the nutrients every week, I dump them into my houseplants or I water my other veggies with it. I have a schleffera (umbrella tree plant) that hasn't been doing much of anything for a while. It was starting to lose it leaves, probably because of the cold blasts of air from outside. I trimmed it back a while ago but it was dormant for a few months. Ever since I started watering it with the used nutes, it has come back to life!


Yay for little baby sprouts! I am pleased that Garfunkel is going to fill out. He was looking pretty pathetic for a while there. I have also started to try my hand at a little bonsai. I bought an inexpensive China Doll shrub and hacked it to pieces! I have yet to decide if I want it to be only one trunk or not.

Well that is all I have for this week, thanks for reading!
Week 3.1 - Planting the new column
February 6, 2011
Just wanted to post some pictures of the plants that I put into my second window farm!
This is the method I use for starting seeds and then transferring them into the window farms. So far I have had success. I wonder if anyone has had any luck starting seeds directly in the hydroton?
Just wanted to post some pictures of the plants that I put into my second window farm!
 |
| These seedlings were all started in 'seed starting mix' so I am washing the dirt out of the roots. |
 |
| Out of a $4.99 pack of stevia seeds, this is what germinated. One decent seedling and one scrawny one. |
 |
| Roots of the stevia (bottom left) and six Pepper 'Hot Hungarian Wax' on the right. |
 |
| Stevia planted into the cosy Tempest soil less medium. |
 |
| Hot peppers! |
 |
| Hopefully these babies will produce so I can pickle some peppers. |
Wednesday, March 2, 2011
Setting Up My Second Column - Week 3
February 5, 2011
Here is an update on my first column:
Does anyone know why my tomato is discolouring? The edges of the leaf are crispy and look like they have been burnt or something.
 OK, now for the new column. Instead of painting the bottles, I used white duct tape. Painting takes so long, and it has been really cold outside, so breaking out the ole' rattle can was not a top priority.
This is a close up of the brand of tape i used.

 I took a trip to the local hydroponics store and I was asking about smaller net pots (the only size smaller is 2" which are puny). When I mentioned that I am using a vertical drip system, the salesman offered me a trial pack of this fluffy plastic medium. Seeing as it was free, and in the spirit of R&D, I am going to try it out.
 This is a close up of the product. It is a 4" diameter column, and it has a square chunk taken out of it to accommodate a rock wool cube or the like.
 I purchased a 10L water jug, which I was intending to use as a reservoir.


 Here are the supplies that I purchased from a pet store for use in hooking up my air pump to supply two airlifts.


Feel free to send me your questions and comments. I look forward to hearing from you!
- Melissa
Here is an update on my first column:
 |
| My bean is flowering! |
 |
| Lanky Broccoli |
 |
| Close up of the broccoli stem, kinky... hahaha. You can see the residue from the spray of nutrients. |
 |
| Roma Tomato |
 |
| Bean plant |
 |
| Swiss Chard "Bright Lights" |
 |
| The 3" net pots are too big to fit in the 1.5L bottles, so I ended up cutting them and using some zip-ties to make the basket a little smaller. |
 |
| Close up of the modified net pot in the bottle. You can see my impatient paint job. |
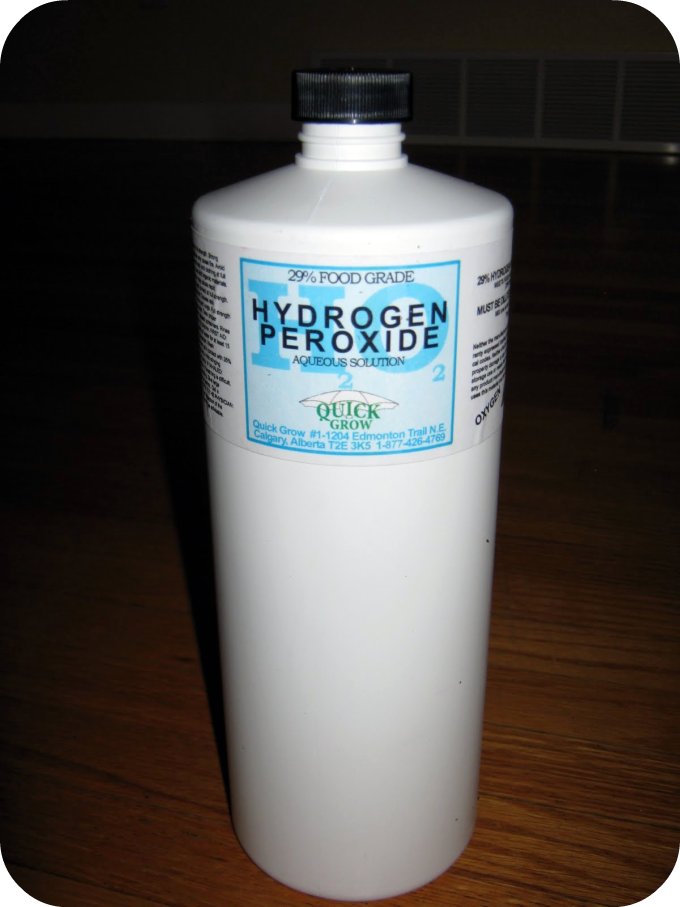 |
| I have started adding hydrogen peroxide to the nutrients. |
 OK, now for the new column. Instead of painting the bottles, I used white duct tape. Painting takes so long, and it has been really cold outside, so breaking out the ole' rattle can was not a top priority.
Also note the white stuff inside the bottle.
This is a close up of the brand of tape i used.

 I took a trip to the local hydroponics store and I was asking about smaller net pots (the only size smaller is 2" which are puny). When I mentioned that I am using a vertical drip system, the salesman offered me a trial pack of this fluffy plastic medium. Seeing as it was free, and in the spirit of R&D, I am going to try it out.
This stuff is called "STG Storm Series Tempest."
It says on the package that it is designed for all types of hydroponics including drip systems.
 This is a close up of the product. It is a 4" diameter column, and it has a square chunk taken out of it to accommodate a rock wool cube or the like.
Because I have been having problems with the net pots, I decided to just squish one of these into each bottle.
They do not hold water at all, so I have to be vigilant in ensuring my airlift is operational at all times or I will have very sad plants.
 I purchased a 10L water jug, which I was intending to use as a reservoir.
During the installation, however, I decided that a 2L pop bottle fits way easier underneath the second column.
I have been using this as a holding tank for the water as I let it sit and de-chlorinate.


Here is a close up of some brass chain that I used to suspend the column. Instead of strapping the bottles to a post, I hung this column from the rack that I purchased from Ikea.
I used a soldering iron to melt two holes into the sides of each bottle near the top. Then I threaded the brass chain through each set of holes.

I apologize for the blurry photo, this is just a close up of how I suspended the column. The chain came with some couplings and links, and I used two of them to secure the loop at the top of each chain.
You can sort of see the way I threaded the bottles from this shot as well.
 Here are the supplies that I purchased from a pet store for use in hooking up my air pump to supply two airlifts.
This is a package of T connectors that I use to combine the water and air in the reservoir as well as to split the airline from the air pump.

This is the valve I use to control the amount of air going into each airlift.
I have been most successful in having a stable airlift when I use this valve to significantly reduce the amount of air going into the air lift.
When you watch the connection underwater, the bubble of air builds up and fills the water intake tube until there is enough air to lift the column of water (which is dependent on submergence).

This is the check valve that is placed in between the control valve and the T connector in the reservoir.
Using this is very important! I am very glad that I installed these, as when I am experimenting with the airlift, sometimes the water flows back to the pump and this is the only thing stopping my pump from getting ruined.
I think this was only around 4$. Way cheaper than replacing the air pump.
Below is a close up of the part of the airlift that is submerged in the reservoir. The coil is a few feet long and secured with zip ties to make changing the nutrients easy. The airline from the pump and the line that travels to the top of the column make up the other 2/3 of the T.

This is how the whole thing sits in the bottom of the reservoir.
After filling the bottle with water and testing the system, I had problems keeping the coil seated on the bottom of the reservoir.
To fix this problem I cut the zip ties and made the coil a bit smaller than the diameter of the bottle. This way I can wedge the coil into the bottle to stop the air from lifting it to the surface of the reservoir.

So here is a shot of my first column's airlift system.
You can see the basic arrangement of tubes.
The line going out the T connector to the top of the photo is is main airlift tube to the top of the column

Here is a shot of the airlift during testing. I have cut a hole into the side of the bottle, which allows the big coil to be put into the bottle.

You can see the valve on the left next to the pump. Also, note that the coil is smooshed into the bottom of the reservoir.

This is the setup that I used to split the air from the air pump.
I use the valves to restrict the air flow, so very little air goes through either side.
This is a bit of a balancing act, and takes a bit of tinkering to get both airlifts working well.

There you have it! My completed second column. I purchased some shoe racks to raise my window farm up a bit so that I can use the bottom bottle. It worked out very well as the legs from my frame fit perfectly into the holes in the shelves and make the whole thing very stable.

- Melissa
Subscribe to:
Posts (Atom)