February 5, 2011
Here is an update on my first column:
 |
| My bean is flowering! |
 |
| Lanky Broccoli |
 |
| Close up of the broccoli stem, kinky... hahaha. You can see the residue from the spray of nutrients. |
 |
| Roma Tomato |
Does anyone know why my tomato is discolouring? The edges of the leaf are crispy and look like they have been burnt or something.
 |
| Bean plant |
 |
| Swiss Chard "Bright Lights" |
 |
| The 3" net pots are too big to fit in the 1.5L bottles, so I ended up cutting them and using some zip-ties to make the basket a little smaller. |
 |
| Close up of the modified net pot in the bottle. You can see my impatient paint job. |
 |
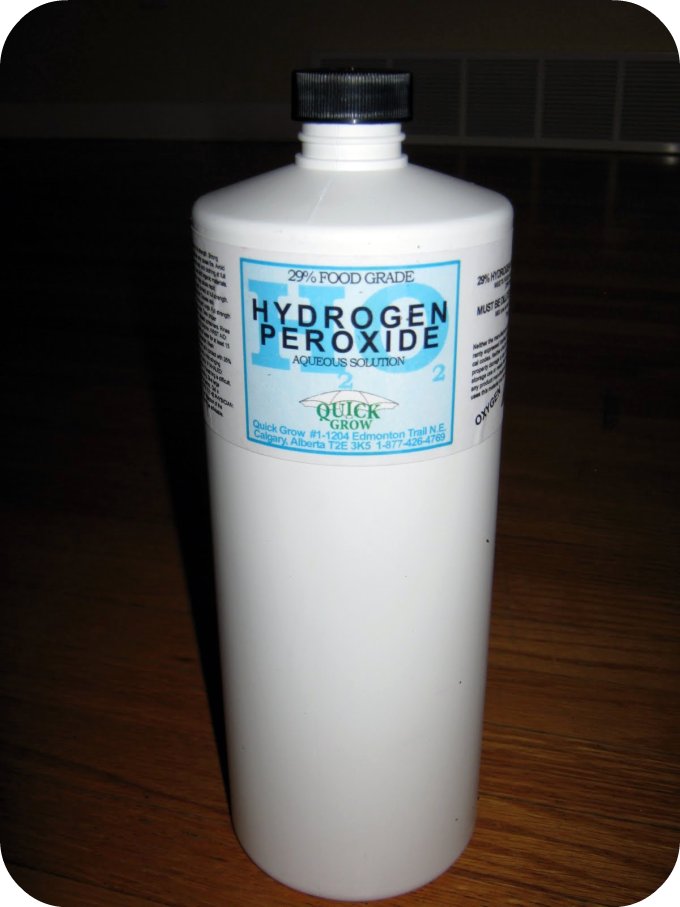
| I have started adding hydrogen peroxide to the nutrients. |

OK, now for the new column. Instead of painting the bottles, I used white duct tape. Painting takes so long, and it has been really cold outside, so breaking out the ole' rattle can was not a top priority.
Also note the white stuff inside the bottle.
This is a close up of the brand of tape i used.

I took a trip to the local hydroponics store and I was asking about smaller net pots (the only size smaller is 2" which are puny). When I mentioned that I am using a vertical drip system, the salesman offered me a trial pack of this fluffy plastic medium. Seeing as it was free, and in the spirit of R&D, I am going to try it out.
This stuff is called "STG Storm Series Tempest."
It says on the package that it is designed for all types of hydroponics including drip systems.

This is a close up of the product. It is a 4" diameter column, and it has a square chunk taken out of it to accommodate a rock wool cube or the like.
Because I have been having problems with the net pots, I decided to just squish one of these into each bottle.
They do not hold water at all, so I have to be vigilant in ensuring my airlift is operational at all times or I will have very sad plants.

I purchased a 10L water jug, which I was intending to use as a reservoir.
During the installation, however, I decided that a 2L pop bottle fits way easier underneath the second column.
I have been using this as a holding tank for the water as I let it sit and de-chlorinate.
Here is a close up of some brass chain that I used to suspend the column. Instead of strapping the bottles to a post, I hung this column from the rack that I purchased from Ikea.
I used a soldering iron to melt two holes into the sides of each bottle near the top. Then I threaded the brass chain through each set of holes.
I apologize for the blurry photo, this is just a close up of how I suspended the column. The chain came with some couplings and links, and I used two of them to secure the loop at the top of each chain.
You can sort of see the way I threaded the bottles from this shot as well.

Here are the supplies that I purchased from a pet store for use in hooking up my air pump to supply two airlifts.
This is a package of T connectors that I use to combine the water and air in the reservoir as well as to split the airline from the air pump.
This is the valve I use to control the amount of air going into each airlift.
I have been most successful in having a stable airlift when I use this valve to significantly reduce the amount of air going into the air lift.
When you watch the connection underwater, the bubble of air builds up and fills the water intake tube until there is enough air to lift the column of water (which is dependent on submergence).
This is the check valve that is placed in between the control valve and the T connector in the reservoir.
Using this is very important! I am very glad that I installed these, as when I am experimenting with the airlift, sometimes the water flows back to the pump and this is the only thing stopping my pump from getting ruined.
I think this was only around 4$. Way cheaper than replacing the air pump.
Below is a close up of the part of the airlift that is submerged in the reservoir. The coil is a few feet long and secured with zip ties to make changing the nutrients easy. The airline from the pump and the line that travels to the top of the column make up the other 2/3 of the T.
This is how the whole thing sits in the bottom of the reservoir.
After filling the bottle with water and testing the system, I had problems keeping the coil seated on the bottom of the reservoir.
To fix this problem I cut the zip ties and made the coil a bit smaller than the diameter of the bottle. This way I can wedge the coil into the bottle to stop the air from lifting it to the surface of the reservoir.
So here is a shot of my first column's airlift system.
You can see the basic arrangement of tubes.
The line going out the T connector to the top of the photo is is main airlift tube to the top of the column
Here is a shot of the airlift during testing. I have cut a hole into the side of the bottle, which allows the big coil to be put into the bottle.
You can see the valve on the left next to the pump. Also, note that the coil is smooshed into the bottom of the reservoir.
This is the setup that I used to split the air from the air pump.
I use the valves to restrict the air flow, so very little air goes through either side.
This is a bit of a balancing act, and takes a bit of tinkering to get both airlifts working well.
There you have it! My completed second column. I purchased some shoe racks to raise my window farm up a bit so that I can use the bottom bottle. It worked out very well as the legs from my frame fit perfectly into the holes in the shelves and make the whole thing very stable.
Feel free to send me your questions and comments. I look forward to hearing from you!
- Melissa
 I am crazy busy, but I have begun my window farm journey 2.0.